Button Control
Button in Component
The usage of the UIComponent enables the possibility to return a button with the usage of a ComponentContainer.
This has the big advantage that no separate dependency has to be installed, and a button for spreadsheet upload can be integrated very easily.
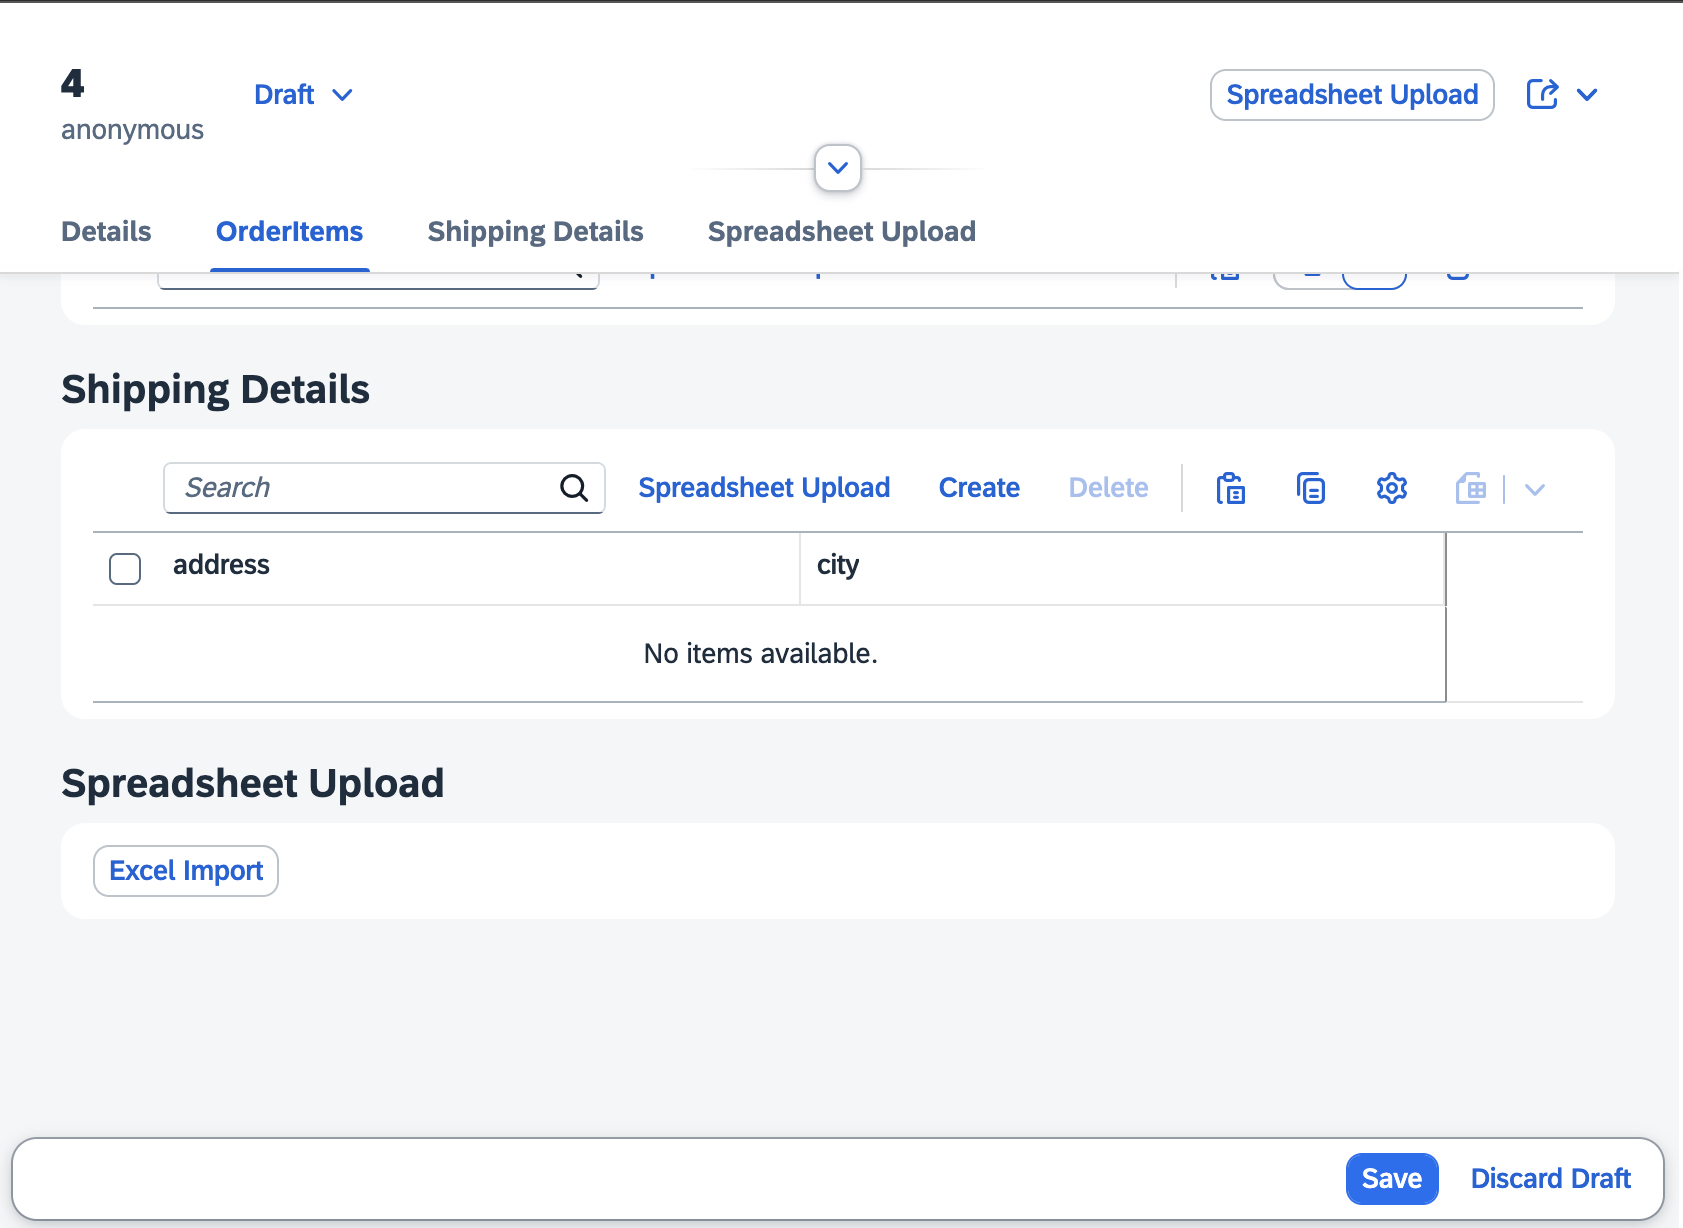
You can also use the button in Fiori Elements applications within a section of an object page (see Including Reuse Components on an Object Page).
Requirements
- Node.js Version v16.18.0, v18.12.0, or higher
- npm Version v8.0.0 or higher
- UI5 CLI v3.0.0 or higher
Getting started
1. Install from npm
2. Add resourceRoots to your manifest.json under sap.ui5
⚠️ You must always keep your ui5-cc-spreadsheetimporter and button version up to date here when updating the module.
Resource Roots Path
The resourceRoots path "./thirdparty/customcontrol/spreadsheetimporter/v2_4_0" changed from version 0.34.0 to lowercase. Please make sure to use the correct path.
"resourceRoots": {
    "cc.spreadsheetimporter.v2_4_0": "./thirdparty/customcontrol/spreadsheetimporter/v2_4_0"
}
3. Add components to your manifest.json under sap.ui5.dependencies
This is optional and preloads the component on startup of the application.
⚠️ You must always keep your ui5-cc-spreadsheetimporter version up to date here when updating the module.
"dependencies": {
  "minUI5Version": "1.108.42",
  "libs": {
    "sap.m": {},
    "sap.ui.core": {},
    "sap.f": {},
    "sap.ui.table": {}
  },
  "components": {
    "cc.spreadsheetimporter.v2_4_0": {}
  }
}
4. Add componentUsages to your manifest.json under sap.ui5
⚠️ You must always keep your ui5-cc-spreadsheetimporter version up to date here when updating the module.
5. Add the namespace core to your XML View
<mvc:View
  controllerName="ui.v2.ordersv2freestylenondraft.controller.UploadToTable"
  xmlns="sap.m"
  xmlns:semantic="sap.f.semantic"
  xmlns:mvc="sap.ui.core.mvc"
  xmlns:core="sap.ui.core"
>
  ...
</mvc:View>
6. Add the core:ComponentContainer control to your view.
<core:ComponentContainer width="100%" usage="spreadsheetImporter" propagateModel="true" async="true" />
Define Configuration Options
You can set configuration options for the spreadsheet importer in the settings property of the core:ComponentContainer control.
For special configuration options for the ComponantContainer, see Configuration.
<core:ComponentContainer
  width="100%"
  usage="spreadsheetImporter"
  propagateModel="true"
  async="true"
  settings="{
  standalone:true,
  columns: ['product_ID', 'username'],
  componentContainerData:{
    uploadButtonPress:'uploadButtonPress',
    buttonText:'Excel Upload'
    }
  }"
/>
Example App
Freestyle OData V2
XML View: Detail.view.xml
Controller: Detail.controller.js
Freestyle OData V2 Standalone
XML View: UploadToTable.view.xml
Controller: UploadToTable.controller.js
Including Reuse Components on an Object Page
You can also use the button in Fiori Elements applications within a section of an object page.
You can define this in the manifest.json under sap.ui.generic.app in the pages property.
The configuration is documented in the UI5 documentation.
A sample configuration can be found in the manifest.json of the OData V4 Fiori Elements app
"body": {
  "sections": {
    "customSectionReuse": {
      "title": "Spreadsheet Upload",
      "embeddedComponent": {
        "name": "cc.spreadsheetimporter.v2_4_0",
        "settings": {
          "tableId": "ui.v4.ordersv4fe::OrdersObjectPage--fe::table::Items::LineItem-innerTable"
        }
      }
    }
  }
}
Screenshot